Project Update: Stencil Madness

How's about a stencil update?  Yeah? Ok, let's go!

Prepare yourself - if you think you're going to see a completed room with furniture rearranged and all mess put away, this is not the post for you.  You'll want to wait for the post I eventually title "FINALLY DONE WITH STENCILING - WOOHOOOO!"  Or something to that effect.

If you're still interested in the progress, then you can keep on reading :)

Since I have yet to track down my good camera, you'll have to put up with my grainy cell phone pictures...but it will give the same effect!


The little wall is done!! Yay yay yay!!!!!!  (Pause for mini victory dance)

The little wall is what you see when you walk right into the room. I love seeing it when I turn the corner into the hallway.

And now, for the larger wall.....


*Pow*Pow*Pow*  *WHA-BAM!*   (that's for you, Mr. B!)

Not done.  But the main large section is! I just have to do the top and bottom and the far left side, and I'll be like 2/3 of the way done!

I told you that it would take a while.

But it's ok!  Life got in the way - and that's the way it should be!! Weddings and friends and enjoying the sunshine is far more important than a wall being done.  No rush!

Ok, quick segue.  Ya'll need to keep me honest though.  It's ok that it's not done now, but if you happen to mention it to me in another month and I haven't made any progress, sit me down for an intervention and whip me into shape.  I give you permission.  Segue done.

So, that's where painting is at.  Once I'm all done with the actual stenciling, I'll have some touch ups to do.  Those are good to save for rainy days though :)

At least, that's what I tell myself.

Thanks for reading!

A Few of my Favorite Things...

I owe everyone an apology for disappearing last week.  Between a crazy work schedule and being lucky enough to be in my amazing friend Kelly's wedding yesterday, time for blogging was hard to come by.  So my apologies for the radio silence!  I'll do my best to make this week's posts extra-special to make up for it!!

Speaking of weddings, here is a picture of Mr. B and I after the wedding.  As I told my friends, I always have to get a picture when the two of us get all fancied up to prove that we clean up ok! lol


I'm a pretty lucky girl to have such a good guy.  He even carried my purse so I could attend to my bridesmaid duties! Oh, and I got to wear a dress with ruffles AND a bow!! Awesome day.

Back to business...As I was writing the blog post a few weeks back about updating our bedroom (for zero dollars!), I shared a few little tools that I use frequently for organizing.  That got me thinking...there are A LOT of other things that I love too (And maybe some people would be interested in hearing about them!)

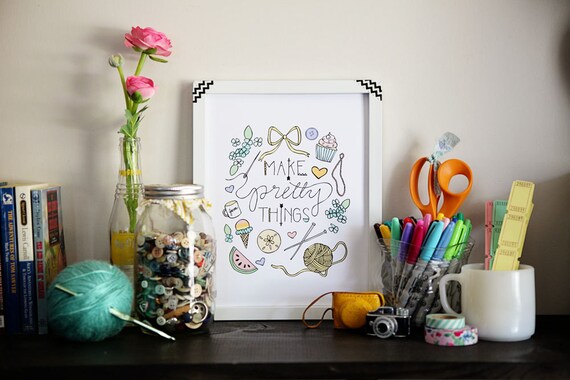
Today, I'm going to share a few of my must-have basic craft supplies.   These are the backbone of my craft room - the tools that allow me to do the basics and do them well!  In later posts, I'll expand tell you about my favorite decor items/brands, fancy craft supplies, tools, and maybe even more!


My first favorite? Tacky glue.


I always have at least one bottle open.  It is extremely versatile, but I find myself using it most for gluing paper and small pieces of wood for craft projects.  Tacky glue is great to have around for crafts as well as household uses.  Be careful, though.  Once you figure out how awesome it is, you might start to hoard it like I do...I usually have at least 2 extra bottles on hand (just in case!)


Next is a paper trimmer.


Many years ago, I was an avid scrapbooker.  Though I haven't been in to it over the last few years of my life, my paper trimmer has moved right along with me wherever I went!  From college to working life to home, I find myself using it extremely frequently.  You never know when I may need to trim a picture or cut a piece of paper for a home decor project!

My trimmer is older so it isn't sold anymore, but you can always find good ones at Joann or Michaels and get a good deal with a coupon.  My favorite brand is Fiskars - they're reliable, last a long time and the replacement blades are easy to find!


Speaking of Fiskars...

The next item up in my list of craft favorites is a super sharp pair of scissors!

Actually, let me restate that.  Make it 2-3 super sharp pairs of scissors.  Now now now, don't get worked up about having too much of a good thing.  Because you can't really have too many scissors.  My theory is that there are SO many different things that you use scissors for, you should really have a pair for each category of crafting.  Here's how my scissor arsenal lays out:

Fabric Scissors
To me, this pair of scissors is holy.  Fabric scissors need to be super-de-duper sharp, and cutting paper or *gasp* cardboard *gasp* will kill them in just a few cuts.  Therefore, Mr. B knows to leave this pair alone (He's a smart guy).  I myself only use them for cutting fabric and ONLY fabric.  That way they stay sharp as long as possible and I don't find myself trying to cut fabric with scissors that work as well as those plastic ones we used in kindergarten!

I have my eye on this pair for the future when I can upgrade. So drool-worthy.  Yep, I drool over scissors.  

Next is a pair of small, fine-tipped scissors.


Right now I'm using the pair you see above.  They are compact and allow for small, sharp cuts for those little, bitty project details.  Generally they get used most for crocheting (and specifically pom pom-making!)

Last is a pair of paper scissors.  Again, Fiskars is my go-to brand, so no picture needed. These are for trimming - wait for it - PAPER.  I know, you never would have guessed, right?  But these ones get a workout for other miscellaneous craft items too.  I tend to use these more freely, so they dull faster.  \

Once they don't work great anymore, they get downgraded to household do-whatever scissors and I grab a new pair.  I just keep an eye out for those times at a craft place when I can double up coupons or find a "fashion" pair on clearance.  Then I can snap them up and keep them at home for when the old pair bites the dust.


Whoo, that was a lot about scissors.  Probably more than you ever wanted to know.  Feel free to leave a comment if you would like me to add scissors to my "off limits blog topics" list!

Back to the topic at hand...my last favorite basic craft supply is a dressmaker's measuring tape.  


Now you won't likely find me using these to make a dress.  In fact, if I mention sewing clothes, direct me to possibly leave that idea and go to one of my other hobbies.  Clothes-making and I do NOT have a good track record...that's a story for another day!

The reason I like a dressmaker's measuring tape is because it is flexible.  The giant ones I use for home improvement are great, but they're bulky and hard to maneuver.  A dressmaker's tape is flexible, so it can be wrapped around a vase or put against the curve of a lampshade.  I use mine all the time!

I'm afraid that I may have lost your interest, so I stop there for now.  However, there are SO many more things that I use all the time I could share with you!!  Here's a list form of some of those things:


Hope you have a great week!


The Weekly Frills - 8.8.14

On Fridays I share a few things that have caught my attention, inspired me or made me swoon during the week.  Here are the frills for this Friday!
______________________________________________________________________


I love to scour Etsy for new artists to love.  Here's one I found with a print I NEED.

Oh, and I need this print too.

Digging this pillow for our bed


Trying to figure out what duvet cover to get for our bed for the winter. Maybe this one.

Or this one.  Too many options!

This lady knows how to work a drill.  And a table saw. And how to not die when working with electricity.  Love it.

Hope y'all have a fantastic weekend!


$0 to Refresh & Reorganize!

Late last week, something happened.

I got the bug. (If you ask Mr. B, he'd probably tell you this happens about once a week, but I digress!)

For a while, I've been meaning to do something about the side table situation in our bedroom.  More specifically, the mess that was the area next to my side of the bed.  It's one of those things that bothered me every time I went to get in bed but by the time I saw it, it was time to actually sleep and not redecorate!

Last Thursday I had some time when I got home from work, so I took advantage and finally did something about the mess!  Mr. B and I are also trying to watch our spending right now, so I knew I would need to do it without spending any money.

Here's what I was working with:


Yep, it was quite something.  I won't feel bad if you cringe a little.

The first step was to get rid of the mess.  Which, of course, just means moving the stacks of random items to a different location.  Temporarily. I mean, I totally, definitely picked up every single thing I moved out of the way when I was working on this.  Hey look, a cute picture of a puppy in the room!


(Ok, good...dodged that bullet!)

Back to the work at hand.

So, once the space was cleared, I decided that I needed to house-source a different side table.  I ended up going with one that I had used for a night table in our condo, but had in the living room at our house.


The size of the table was perfect, and it definitely had more storage capability that I was looking for!  But oh, that lamp.  

So, I decided to house-source that too!  A few weeks back I found an awesome gold lamp on one of my Goodwill visits.  It's geometric, nice and big, and, did I mention....gold?!?  I had to try it out.


And though it is beautiful and pretty much my soulmate-in-a-lamp, it wasn't quite right.  It was actually a little too big for the table, and it didn't go with the lamp on Mr. B's side table.

Back to the lamp drawing board.  My other thought was a lamp that was in our living room.  It has a white base and a white and yellow patterned shade.  

I tried it out on my newly chosen side table, and it was a winner!


So then I decided to try adding a lamp with the same shade to Mr. B's side of the bed.


And it was perfect!  Even though the bases on the lamps don't match, the shades add the right color to the room and the bases are different enough that they don't clash.  I'm keeping my eye out on my thrifting trips for another brass lamp base for my side of the bed, but for now it is definitely an upgrade from the old, mismatched lamps that we had before!

The last thing I needed to do was ORGANIZE!  All of that stuff piled up on the bed needed to be gone through, purged, and placed in their new side table home.

And after a little work, here's what the top drawer of my side table looks like now:


I'm a fan of divided drawer organization...can you tell? LOL.  I've got 5 areas in this drawer:

1. Diabetes corner - all those things I might need in case my blood sugar goes low in the middle of the night
2. Miscellaneous stuff I find myself needing before bed - chapstick, glasses cleaner, etc
3. Health stuff - I like to keep things like tums and bacitracin next to my bed.  Don't ask me why, I just do.
4. Things I use every night - my vitamins, face wipes and moisturizer
5. Sleep Number bed remote - because otherwise it would get lost :)

One trick that I use to keep the little baskets in place in my drawers is using little velcro squares on the bottom of the basket and in the drawer


That way, the baskets stay in place and I can keep things organized without even trying!  When things come out and go back in, they automatically keep separated.  The velcro squares are easy to remove if I ever want to reorganize the drawer or use the basket for something else.

One of my other favorite organizational tools - Cord Clips!!


They are little half-round things with a slit down the middle that hold a cable in place when you're not using it.  I put two of them on the back of my nightstand to hold my phone and glucose monitor charging cables.  The picture only shows one, but I added another later that night!  I grab mine at the Container Store, but I have seen them other places too.  (I just like a reason to go to the Container Store)

Now everything had a home in my nightstand and there was zero clutter on the floor! So I did a little happy dance!

And here is a picture of what the room looks like with a bed that isn't covered on randomness and is actually made, along with the new lamps, table, and my favorite DIY project to date, my wooden display hanging!

The Weekly Frills - 8.1.14

On Fridays I share a few things that have caught my attention, inspired me or made me swoon during the week.  Here are the frills for this Friday!

*I'm trying to focus a little more on having more items and less description this week...let me know your thoughts!*

________________________________________________________________________


Want to make this beautiful bench!

This is the kind of desk I need when my craft room gets bigger by moving downstairs!


Love this white kitchen...all from IKEA!  Down the line we definitely want to use IKEA to update our own kitchen

Need to make a dog bowl holder for Fitz.  The upside-down cardboard box just isn't cutting it anymore.


Love these art prints

________________________________________________________________________

Happy Friday!